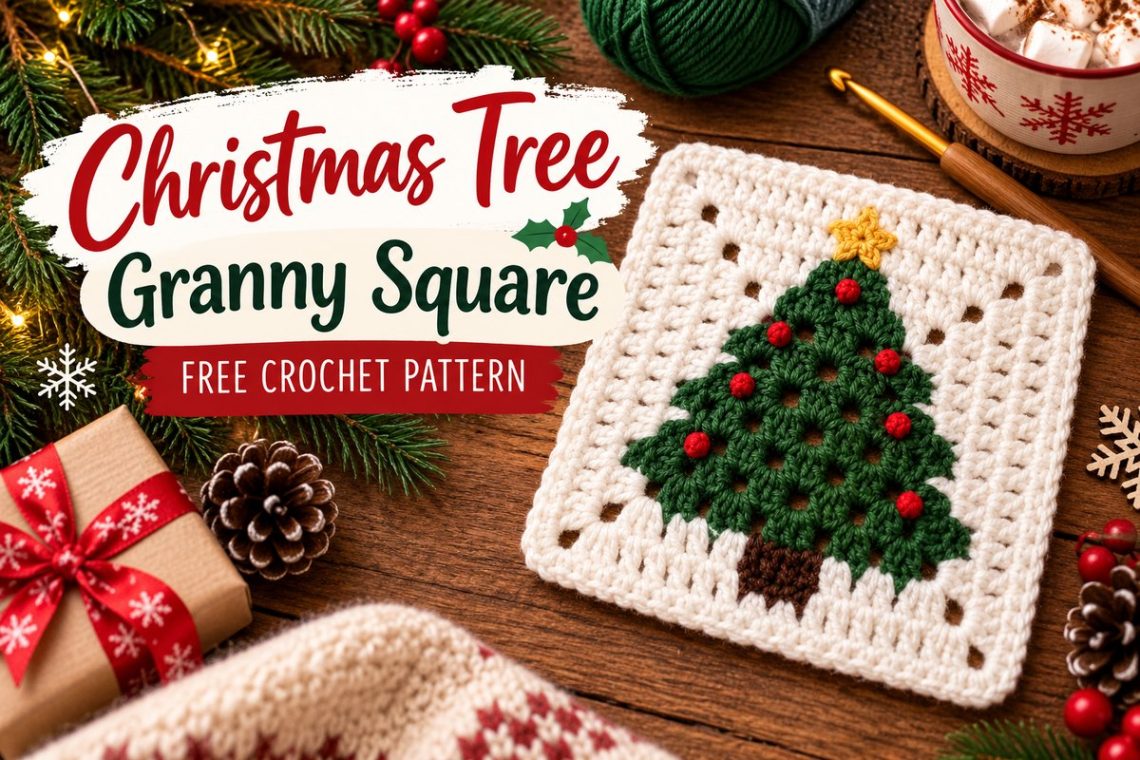
Looking for a fun and festive crochet project for the holiday season? This Christmas tree granny square crochet pattern is a lovely way to bring a little handmade charm to your Christmas decorations. With green yarn, a white border, and a classic granny square design, you can create a beautiful square to use in blankets, coasters, ornaments, and more.
This pattern is suitable for crocheters who know the basic stitches and want to practice working in the round and changing colors. Even if you’re still learning, the step-by-step instructions will help you follow along at your own pace.
Grab your favorite yarn and crochet hook, and let’s make a Christmas tree granny square!

Why You’ll Love This Christmas Crochet Pattern
There are plenty of reasons to add this festive granny square to your holiday crochet projects.
- Beginner-friendly practice: Work on double crochet stitches, chain spaces, and color changes.
- Uses leftover yarn: This small project is a great way to use up scraps of green and white yarn.
- Easy to customize: Choose traditional Christmas colors or experiment with different shades.
- Versatile design: Turn your finished squares into blankets, coasters, ornaments, or handmade gifts.
Whether you’re making one square or planning a larger Christmas crochet project, this design is a fun addition to your collection.
Materials You’ll Need
Before getting started, gather the following supplies:
- Yarn: Worsted-weight yarn in Christmas green and white.
- Crochet hook: 5 mm (H/8) crochet hook.
- Scissors: For cutting the yarn.
- Tapestry needle: For weaving in the loose ends.
- Stitch markers: Optional, but useful for keeping track of your rounds.
Cotton or acrylic yarn can both work well. If your square feels too tight or curls at the edges, try a slightly larger hook.

Crochet Abbreviations
This tutorial uses US crochet terminology.
- ch: Chain
- dc: Double crochet
- sl st: Slip stitch
- st(s): Stitch(es)
- sp: Space
Note: The beginning chain 3 counts as the first double crochet whenever specified.
Basic Techniques to Know
1. Magic Ring
A magic ring allows you to start crocheting in the round without leaving a large hole in the center.
Make a loop with your yarn, insert your hook, pull up a loop, and begin working your stitches into the ring. Once the first round is complete, pull the yarn tail to tighten the center.
2. Double Crochet Cluster
A traditional granny square cluster consists of three double crochet stitches worked into the same space.
Yarn over, insert your hook into the space, pull up a loop, and complete a double crochet. Repeat twice more in the same space to make a three-double-crochet cluster.
3. Invisible Color Change
For a cleaner color transition, change yarn colors during the final pull-through of the last stitch in the old color.
When only the final loops of the stitch remain on your hook, yarn over with the new color and pull it through. Continue crocheting with the new color.

Christmas Tree Granny Square Pattern
Now it’s time to create your festive crochet square. Follow the rounds below, alternating between green and white yarn to create the Christmas tree design.
Round 1: Create the Center
Using green yarn:
- Make a magic ring.
- Chain 3. This counts as your first double crochet.
- Work 2 double crochet stitches into the center of the ring.
- Chain 2.
- Work 3 double crochet stitches into the ring.
- Chain 2.
- Repeat the sequence of 3 double crochet stitches and chain 2 two more times.
- You should have four groups of double crochet stitches and four chain-2 corner spaces.
- Pull the yarn tail to close the magic ring.
- Join with a slip stitch into the third chain of the beginning chain-3.
Round 2: Build the Square
Continue with green yarn.
- Chain 3, then chain 1.
- In the next chain-2 corner space, work 3 double crochet stitches, chain 2, and 3 double crochet stitches.
- Chain 1 and move to the next corner space.
- Repeat the corner sequence of 3 double crochet stitches, chain 2, and 3 double crochet stitches.
- Continue around the square, working chain-1 spaces between the corners.
- Join the round with a slip stitch into the third chain of the beginning chain-3.
You should now have a larger square with clearly defined corners.
Round 3: Introduce the White Yarn
This round begins to create the contrast that gives your square its festive appearance.
- With green yarn, chain 3 and work 2 double crochet stitches into the next chain-1 space.
- Change to white yarn during the final pull-through of the last double crochet.
- Chain 1 with white yarn.
- In the next chain-2 corner space, work 3 double crochet stitches, chain 2, and 3 double crochet stitches.
- Chain 1 and work 3 double crochet stitches into the next chain-1 space.
- Change back to green yarn during the final pull-through of the last stitch.
- Chain 1 and work the corner sequence in the next chain-2 space.
- Continue around the square, alternating the colors as directed.
- Join the round with a slip stitch into the third chain of the beginning chain-3.
Keep your stitches relaxed when changing colors so that the square stays flat.

Round 4: Continue Building the Tree Design
In this round, continue alternating green and white to add more detail to the tree motif.
- Chain 3, then chain 1.
- Work 3 double crochet stitches into the next chain-1 space.
- Change to white yarn during the final pull-through of the last stitch.
- Chain 1 and work 3 double crochet stitches, chain 2, and 3 double crochet stitches into the corner space.
- Chain 1 and work 3 double crochet stitches into the next chain-1 space.
- Change colors as needed to continue the alternating pattern.
- Work the corner clusters in the appropriate corner spaces, maintaining the square shape.
- Continue around the square and join with a slip stitch.
Helpful tip: You can carry the unused yarn along the back of your work by crocheting over it. This reduces the number of yarn ends you’ll need to weave in later.
Round 5: Add the White Snow Border
Finish the square with a clean white border.
- Join white yarn if necessary.
- Chain 3, then work 2 double crochet stitches into the next chain-1 space.
- Chain 1.
- In the corner space, work 3 double crochet stitches, chain 2, and 3 double crochet stitches.
- Chain 1 and work 3 double crochet stitches into the next chain-1 space.
- Repeat the pattern around the square, adding a corner cluster at each corner.
- Join with a slip stitch into the third chain of the beginning chain-3.
Your Christmas tree granny square is nearly finished!
How to Finish Your Granny Square Neatly
A tidy finish makes a big difference to the appearance of your crochet project.
- Cut the yarn, leaving a tail of approximately 6 inches.
- Pull the tail through the final loop.
- Thread the tail onto a tapestry needle.
- For an invisible join, insert the needle from back to front under both loops of the next double crochet.
- Insert the needle into the center of the beginning chain-3 from front to back.
- Gently pull the yarn to imitate the appearance of a regular stitch.
- Weave in all remaining yarn ends securely.
If your square looks slightly uneven, blocking can help. Pin it to a blocking mat, lightly mist it with water if appropriate for your yarn, and leave it to dry completely.

Tips for Better Color Changes
Changing colors neatly can take practice, but a few simple techniques can help.
Carry the yarn: Crocheting over the unused color saves time and reduces the number of ends to weave in. Make sure you don’t pull the carried yarn too tightly.
Cut and rejoin the yarn: If you want to minimize the amount of yarn visible on the back, cut the yarn at each color change and weave in the ends afterward.
Check your tension: Tight stitches can make your square curl or pull inward. Keep your tension consistent throughout the rounds.
Count your corners: Make sure each corner has the correct chain-2 space. This helps the square maintain its shape.
What Can You Make With Christmas Tree Granny Squares?
Once you’ve finished your square, there are several ways to use it in your holiday projects.
1. Christmas Coasters
Use a single square as a festive coaster for your coffee or tea. Make a matching set to give as a handmade Christmas gift.
2. A Christmas Granny Square Blanket
Make multiple squares and join them together using your preferred crochet joining method. You can alternate the direction of the trees to create an interesting patchwork design.
3. Festive Bags and Garments
Use your squares as panels for a crochet bag, cardigan, scarf, or other winter accessory. Combine them with solid-colored squares for a balanced design.
4. Handmade Christmas Decorations
Create smaller squares using lighter yarn and a smaller hook. Add a ribbon loop if you want to hang them as decorations, making sure the finished size suits your project.
Frequently Asked Questions
Is this Christmas tree granny square suitable for beginners?
Yes, if you’re familiar with basic crochet stitches. Beginners may need extra practice with working in the round and changing colors.
What yarn is best for a Christmas granny square?
Worsted-weight cotton or acrylic yarn is a practical choice. Green and white create a classic Christmas look, but you can choose any colors you prefer.
Why is my granny square curling?
Curling can happen when your tension is too tight or the stitches and spaces are inconsistent. Try a larger hook and check that you’re working the correct number of stitches into each space.
How do I join multiple granny squares?
You can join finished squares using slip stitches, single crochet, or a sewn join. Choose a method that suits the look and flexibility you want for your finished project.
Final Thoughts
This Christmas tree granny square crochet pattern is a festive way to practice your crochet skills while creating something handmade for the holiday season. From cozy blankets to decorative coasters, these little squares can become part of many creative Christmas projects.
Choose your favorite yarn colors, take your time with the color changes, and enjoy watching your Christmas tree design come together.
If you enjoyed this tutorial, explore more crochet patterns and DIY ideas on Great Object for inspiration for your next handmade project.
Happy crocheting!