
Introduction
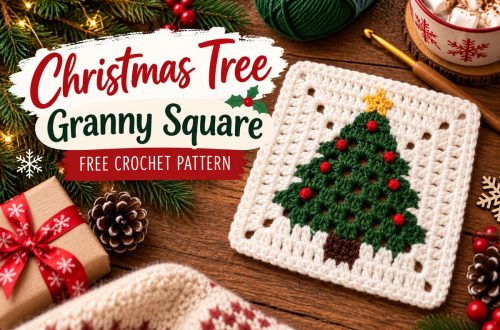
Bring a little handmade magic to your Christmas decorations with this adorable scalloped crochet Christmas tree ornament! Featuring beautiful green layers, delicate silver edging, tiny red baubles, and a sparkling star, this festive design is a charming addition to any holiday craft collection.
Unlike traditional crochet Christmas tree patterns, this ornament is made from individual crocheted tiers that are assembled to create a lovely layered effect. The scalloped edges give the tree a soft, decorative appearance, while the contrasting colors make every detail stand out.
Whether you want to decorate your Christmas tree, create handmade gifts, or add something special to your holiday garland, this crochet project is a wonderful choice.
The pattern is suitable for confident beginners who are familiar with basic crochet stitches. With cotton yarn, a small crochet hook, and a little patience, you can create a beautiful seasonal ornament that you will enjoy displaying year after year.
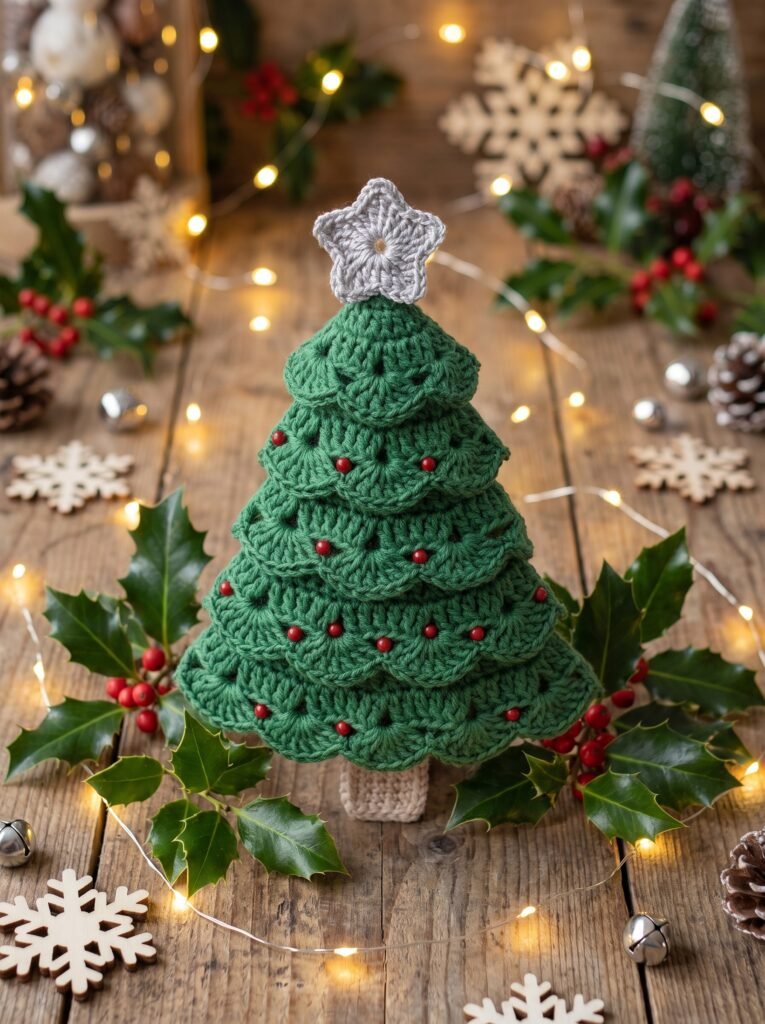
Crochet Christmas Tree Ornament Details
- Skill Level: Easy
- Project Type: Flat crochet appliqué
- Estimated Time: 2.5–3 hours
- Finished Size: Approximately 4.75 inches wide × 6.5 inches tall
- Yarn: Sport-weight cotton yarn
- Crochet Hook: 2.5 mm
- Crochet Terms: US terminology
- Construction: Six layered tiers with decorative finishing
Materials You Will Need
Before beginning your crochet Christmas tree, gather the following supplies.
Yarn
- Green or cream sport-weight cotton yarn (#2) – approximately 45 yards
- Silver metallic yarn or fine crochet thread – approximately 12 yards
- Tan or light brown cotton yarn – approximately 3 yards
- Red embroidery floss or 21 small red seed beads (3–4 mm)
Mercerized cotton is a good option if you prefer a smooth, defined finish. For the silver details, choose metallic yarn that is flexible enough to crochet comfortably.
Crochet Tools
- 2.5 mm crochet hook
- Optional 2.75 mm hook for the metallic edging
- Tapestry needle
- Sewing needle and white thread for beads
- Scissors
- Sewing pins or stitch markers
- Optional white felt for backing
Crochet Abbreviations
This tutorial uses standard US crochet terminology.
| Abbreviation | Meaning |
|---|---|
| ch | Chain |
| sl st | Slip stitch |
| sc | Single crochet |
| hdc | Half double crochet |
| dc | Double crochet |
| sk | Skip |
| st/sts | Stitch/stitches |
| MR | Magic ring |
Shell: Five double crochet stitches worked into the same stitch.
Repeat: Follow the instructions between the indicated symbols as directed.
Stitch count: The number of stitches at the end of a row.
Before Starting: Crochet Gauge
Make a small double crochet swatch using your sport-weight cotton yarn and 2.5 mm hook.
The recommended gauge is approximately 13 double crochet stitches and 6 rows per 2 inches (5 cm).
Gauge is not essential for this decorative project, but it can influence the final size of your ornament. If your stitches are loose, your tree may turn out larger than expected.
Step-by-Step Crochet Christmas Tree Pattern
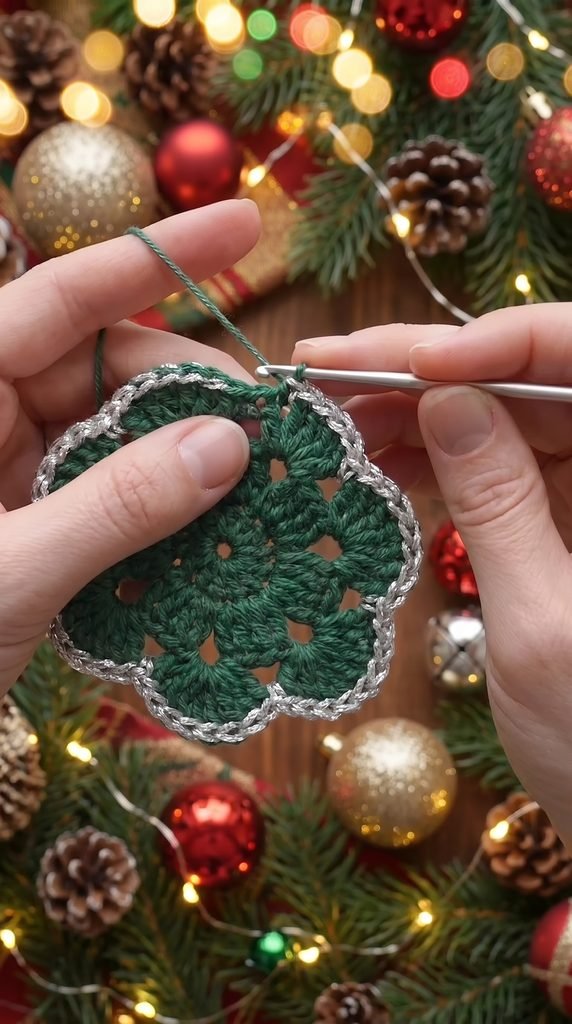
The ornament consists of six green tiers, a silver star, a small trunk, and a hanging loop.
Part 1: Crochet the Top Tier
The first green layer creates the pointed top of your Christmas tree.
Row 1:
Ch 2. Work 3 sc into the second chain from the hook. (3 sc)
Row 2:
Ch 1 and turn. Work 2 sc in the first stitch, sc in the next stitch, and 2 sc in the final stitch. (5 sc)
Row 3:
Ch 3 (counts as a dc), turn. Work dc in the first stitch at the base of the chain, dc in the next 3 stitches, and 2 dc in the final stitch. (7 sts)
Row 4:
Ch 3 and turn. Dc in the first stitch, dc across to the final stitch, then work 2 dc into the last stitch. (9 sts)
Row 5 – Scalloped Shells:
Ch 1 and turn. Work sc in the first stitch, skip 1 stitch, make 5 dc in the next stitch, skip 1 stitch, and continue with the scallop pattern as directed. Fasten off, leaving a sewing tail.
Part 2: Crochet the Remaining Tree Layers
The remaining five tiers gradually increase in width to form the body of the Christmas tree.
Each tier begins with a different chain length.
| Tier | Starting Chain | Shell Count |
|---|---|---|
| Tier 2 | Ch 10 | 3 shells |
| Tier 3 | Ch 14 | 4 shells |
| Tier 4 | Ch 18 | 5 shells |
| Tier 5 | Ch 22 | 6 shells |
| Tier 6 | Ch 26 | 7 shells |
Foundation Row:
Chain the required number for your tier. Work sc into the second chain from the hook and into each remaining chain.
Row 2:
Ch 3 and turn. Work dc into the first stitch, dc across to the last stitch, and make 2 dc in the final stitch.
Row 3:
Ch 3 and turn. Work dc in the first stitch, dc across to the last stitch, and work 2 dc into the last stitch.
Row 4 – Shell Border:
Ch 1 and turn. Work sc in the first stitch, skip 1 stitch, and make 5 dc in the next stitch. Continue repeating the scallop sequence across the row, finishing with sc in the final stitch.
Fasten off, leaving a long tail for sewing.
Part 3: Add the Silver Scalloped Edging
The silver border gives the green tree a beautiful festive sparkle.
With the right side facing you, join the silver yarn with a slip stitch in the first single crochet of the shell row.
Ch 1 and work:
- Sc in the joining stitch
- Sc in the next 2 dc
- 2 sc in the center dc of the shell
- Sc in the next 2 dc
- Sc in the following sc
Repeat this sequence across the scalloped edge.
Fasten off and weave in the ends on the back of the tier.
Repeat the edging process for all six green layers.
Part 4: Crochet the Silver Star
The little star is the finishing touch that makes the ornament look like a traditional Christmas tree.
Round 1:
Make a magic ring. Ch 1 and work 10 sc into the ring. Pull the ring closed, leaving a small opening, and join with a slip stitch to the first sc. (10 sc)
Round 2 – Star Points:
Ch 4. Work:
- Sl st into the second chain from the hook
- Sc into the next chain
- Hdc into the final chain
Skip the next sc on the round and slip stitch into the following sc.
Repeat this sequence five times to create five star points. Fasten off, leaving a sewing tail.
Part 5: Make the Tan Tree Trunk
Using tan or light brown cotton yarn, crochet a small rectangular trunk.
Row 1:
Ch 6. Sc into the second chain from the hook and each remaining chain. (5 sc)
Rows 2–7:
Ch 1 and turn. Sc across all 5 stitches.
Fasten off after Row 7, leaving a tail for sewing.
Part 6: Create the Hanging Loop
The hanging loop allows you to display your finished crochet ornament on your Christmas tree.
Using green yarn:
Ch 36, approximately 6 inches in length.
Fasten off, leaving a tail at both ends.
Assembling Your Crochet Christmas Tree
Once all the pieces are complete, it is time to bring your ornament together.
Step 1: Block the Green Tiers
Pin each crocheted layer flat onto a towel. Lightly spray with water and allow the pieces to dry.
Blocking helps the scalloped edges become more even and gives the layers a neat appearance.
Step 2: Position the Second Tier
Place the top tier right side up.
Position Tier 2 behind it so that the upper rows remain hidden beneath the scalloped edge of Tier 1.
Make sure the centers of both pieces are aligned.
Step 3: Sew the Layers Together
Use the sewing tail from Tier 2 to attach its foundation row to the back of Tier 1.
Whipstitch carefully, catching only the back bumps of the stitches to keep the seam discreet.
Step 4: Attach the Remaining Layers
Repeat the same process with Tiers 3, 4, 5, and 6.
Each new tier should sit behind the layer above it, creating a natural tree shape.
Keep the center line straight and make sure the scallops remain visible.
Step 5: Attach the Trunk
Center the tan trunk behind the bottom tier.
Allow the lower rows of the trunk to extend below the green tree.
Sew the trunk securely to the back.
Step 6: Add the Red Christmas Baubles
Decorate the tree with tiny red ornaments.
Place each red dot in the space between two scallops, just above the silver edging.
The recommended distribution is:
| Tier | Red Decorative Dots |
|---|---|
| Tier 1 | 1 |
| Tier 2 | 2 |
| Tier 3 | 3 |
| Tier 4 | 4 |
| Tier 5 | 5 |
| Tier 6 | 6 |
| Total | 21 |
You can attach red seed beads with sewing thread or create small French knots using red embroidery floss.
Step 7: Attach the Hanging Loop
Fold the green chain in half.
Position both ends behind the pointed top of the tree. Thread the tails through the stitches, tie securely, and weave in the ends.
Step 8: Sew on the Silver Star
Use the remaining silver yarn to attach the star to the top of the tree.
Position it so that the lower points overlap the green top tier slightly.
Step 9: Add a Felt Backing (Optional)
For a firmer ornament, trace the finished tree onto white felt and cut out the shape.
Attach the felt to the back using glue or whipstitching.
This helps hide the sewing and gives your decoration additional stability.
Finishing Your Handmade Christmas Ornament
After assembly, weave in all remaining yarn ends.
Make sure every seam is secure and the decorative details are firmly attached.
Lightly mist the finished tree with water and let it dry flat. This final step helps the scalloped edges settle into a more uniform shape.
Your handmade crochet Christmas tree ornament is now ready to display!
Hang it on your Christmas tree, add it to a holiday wreath, or use it as part of a handmade Christmas garland.
Helpful Tips for a Beautiful Finish
Keep the Scallops Flat
If the shell stitches begin to curl or ruffle, try using a slightly smaller hook for the shell row. You can also experiment with four double crochet stitches instead of five per shell.
Pay Attention to Turning Chains
The ch 3 at the beginning of each double crochet row counts as a stitch.
Remember to work the final increase into the top of the turning chain from the previous row.
Check Your Stitch Counts
Before making the shell border, verify that the row contains the correct number of stitches.
The tiers are designed around stitch counts of 9, 13, 17, 21, 25, and 29 stitches.
Avoid Tight Metallic Stitches
Metallic yarn can be less flexible than cotton. Work the silver edging loosely to prevent the scallops from curling.
Position Each Tier Carefully
Avoid overlapping the tiers too much. Excessive overlap can hide the shell details and make the tree look flat.
Creative Ways to Customize Your Crochet Christmas Tree
One of the best things about this pattern is how easily you can change its appearance.
Traditional Christmas Colors
Use green yarn with silver edging and red baubles for a classic festive look.
Gold and Multicolor Decorations
Replace the silver border with gold metallic yarn and use tiny multicolor beads for a cheerful holiday style.
Scandinavian-Inspired Tree
Try cream-colored cotton with red edging. Leave out the beads for a clean, minimalist design.
Miniature Christmas Tree
For a smaller ornament, crochet only the first four tiers. This creates a compact decoration that works beautifully on smaller Christmas trees.
Larger Crochet Tree
Use worsted-weight cotton yarn and a 4.5 mm crochet hook to make a larger version suitable for wall decorations.
Two-Sided Christmas Ornament
Make two complete tree shapes and sew them together with a little stuffing between them.
This creates a soft ornament that looks attractive from both sides.
Frequently Asked Questions
How long does it take to crochet this Christmas tree ornament?
The estimated time is around 2.5–3 hours. Your actual time will depend on your crochet speed and how long you spend assembling and decorating the pieces.
Is this crochet Christmas tree pattern beginner-friendly?
Yes. The pattern is rated easy and is suitable for confident beginners who know chain, single crochet, and double crochet stitches.
What yarn should I use?
Sport-weight cotton yarn is recommended for the green tiers. Metallic yarn or fine crochet thread is used for the silver edging and star.
How many scallops does the finished tree have?
The six layers contain 2, 3, 4, 5, 6, and 7 shells, respectively, giving a total of 27 shells.
How many red decorations are needed?
The recommended design uses 21 red decorative dots. You can use small seed beads or embroidery floss.
Can I make the ornament larger or smaller?
Absolutely! Changing the yarn weight and crochet hook size will affect the final dimensions. You can also make a smaller tree by using fewer layers.
How should I store my crochet Christmas tree ornament?
Make sure the ornament is completely dry before storing it. Keep it flat in a clean, dry container to protect the scalloped edges and decorative details.
Final Thoughts

This scalloped crochet Christmas tree ornament is a lovely way to bring handmade charm into your holiday decorations.
Its layered green design, delicate silver edging, bright red baubles, and tiny star create a festive decoration that looks beautiful on any Christmas tree.
Whether you make one for yourself or create several as handmade gifts, this project is a fun way to enjoy Christmas crochet.
Gather your yarn, prepare your crochet hook, and start creating your own little handmade Christmas tree!
Happy crocheting!